|
By: Mark Gilger / WB0IQK
|
-
-
-
-
-
-
-
-
-
- Compressed air
spray can. Used for PC cleaning.
|
Surface
Preparation:
- Clean grime from
surface area with Windex, or soap & water.
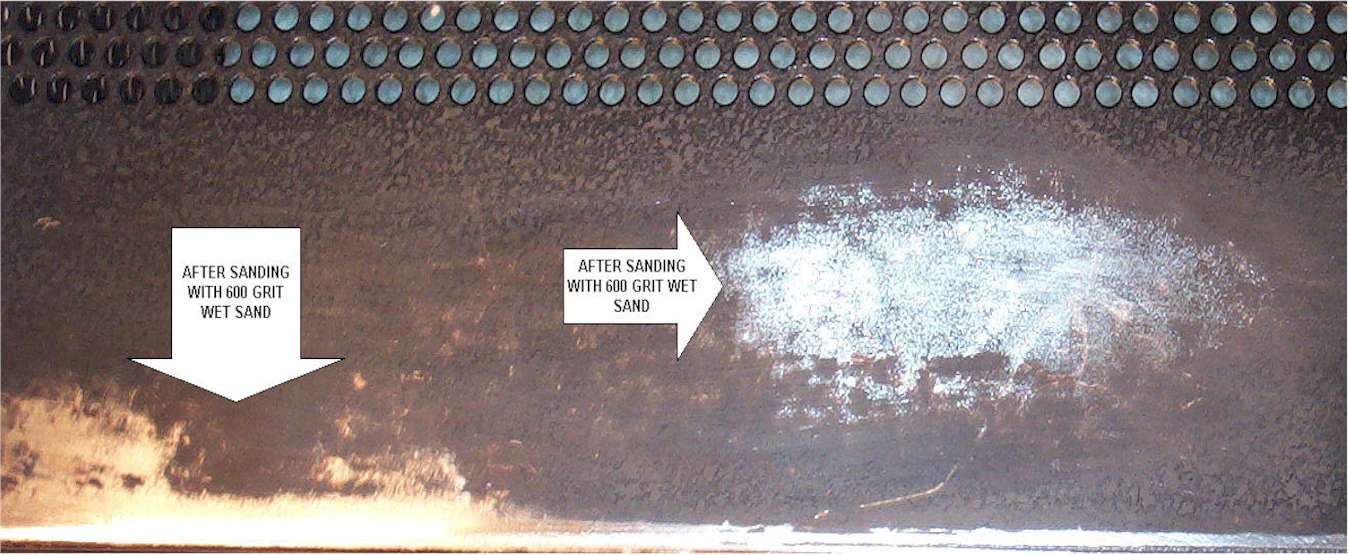
- Put #600 grit
sandpaper on the 3M sanding block and with a small amount of running
water, start lightly sanding the entire surface. Be careful not to sand
over any of the silk screen wording on the lower cabinet section.

- Typical of an
old cabinet are minor, or sometime major scratches and paint chips. No
mater how small, you can not under prepare these area’s. If you fail to
prepare correctly, you will have an otherwise nice paint job, but you
will still be able to see the scratch
- After the minor
light sanding of the entire cabinet, now concentrate on the area’s with
defects. You need to meet two goals. (1) you need to feather the
area. Feathering the area simply means that you sand the defect area to
around 4 – 5 times it’s original size making sure there is a gradual
transition from painted area to bare metal. (2) When feeling the area
with you finger, you should not be able to feel defects or the
transition from painted area, to bare metal.
- Once the cabinet
has been sanded, spray the entire area with Windex or Denatured Alcohol.
Do not substitute. Try and not touch the prepared surface with
your bare hands. You don’t want any hand oils present on the prepared
surface. If you do touch it, clean area with Windex and let dry.
|
 |
|
Cabinet Silk Screen Letter Protection:
-
Cabinet silk screen lettering needs to be protected during sanding and
painting. 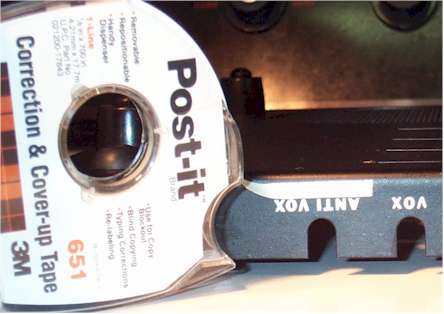
-
During the sanding process, no preparation needs to be made other than
making sure you do not sand over the silk screened area’s.
-
Before priming and painting, the effected silk screen lettering needs to
be covered. I’ve found that the “Post-it” brand #651 Correction &
Cover-up Tape works good. It can be obtained from just about any office
supply office. It’s used to correct typing errors when using a
typewriter. The tape is good for our purposes because it has a very
light adhesive backing and pulls away easily from the silk screened
area.
-
Trim
the tape length and height to match the word being covered.
|
Priming:
- With the Krylon
#51317 Rubby Brown Primer, prime the prepared surface with 3 or more
light coats. Let the surface completely dry before applying the next
coat. If you prefer, you can also prime the entire cabinet, but
excellent results will be obtained by just doing the effected area’s.
- Once the primer
is completely dry, wet sand the entire cabinet with #1000 grit
sandpaper.
- Once again,
verify the surface is smooth and defects can no longer be detected by
rubbing your bare fingers across the surface. If no defect can be felt,
proceed to the next step, if defects are still detectable, redo
preparation steps before proceeding.
- Spray the front
lip area with compressed air to blow out trapped water from the inside
overhang lip.
- Let cabinet dry
for several hours in the direct sunlight.
Painting:
- With Windex,
spray the cabinet to make sure the area is clean and let dry.
- With a smooth
back and forth motions, spray the cabinet with Krylon #51613 Satin Black paint. For best results, do not get any closer than 12 inches from
the cabinet. Spray 3 or more coats, letting it completely dry between
coats until the desired results are obtain.
- Sand the entire
cabinet again very lightly with #1500 wet dry sand paper using the 3M
sanding block and plenty of water until no rough area’s are detectable.
|
Painting Spackling:
- With the proper
drill bit, ream out the spray button hole. The idea is to enlarge the
spray hole to a point where the paint sprays out more in drops, instead
of a fine mist. You might need to
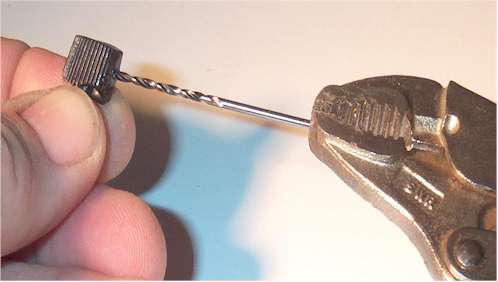 experiment with drill bit sizes until the desired results are obtained.
I’ve found the #51 bit works best for the Drake cabinets.
experiment with drill bit sizes until the desired results are obtained.
I’ve found the #51 bit works best for the Drake cabinets.
- With the can
positioned about 2 feet from the cabinet, using smooth back and forth
motions, spray a light coat across the entire cabinet surface until the
desired spackling effect is obtained.
- Remove the tape
covering the silk screening.
- In most cases,
you can make an ultra light sanding with the #1500 sandpaper over the
silk screened area to remove any paint ridges created by the tape.
|