WB4HFN Home Page Drake Technical Tips Menu Drake Home Page Collins Home Page Heathkit Home page
![]()
Drake L4B - All In One Redesign
by: Ronald Baker / WB4HFN
Contents >Page 1< Page 2 Page 3 Page 4
![]()
|
The L4B Amplifier Chassis Redesign Today you can find the L4B amplifier without the L4PS power supply from several sources, such as hamfests and through the e-Bay auctions. There is not much you can do with an L4B Amplifier without the power supply, so what are your options. Those include finding another working power supply, or one that can be repaired, or, building up a home-brew version. One another option, described in this article is to build the power supply inside the L4B Amplifier. Granted after the conversion is completed it no longer has the same power output capability as the original L4B, but it does make a nice completely self-contained table top amplifier that with 80 watts of drive, will produce around 750 watts output.
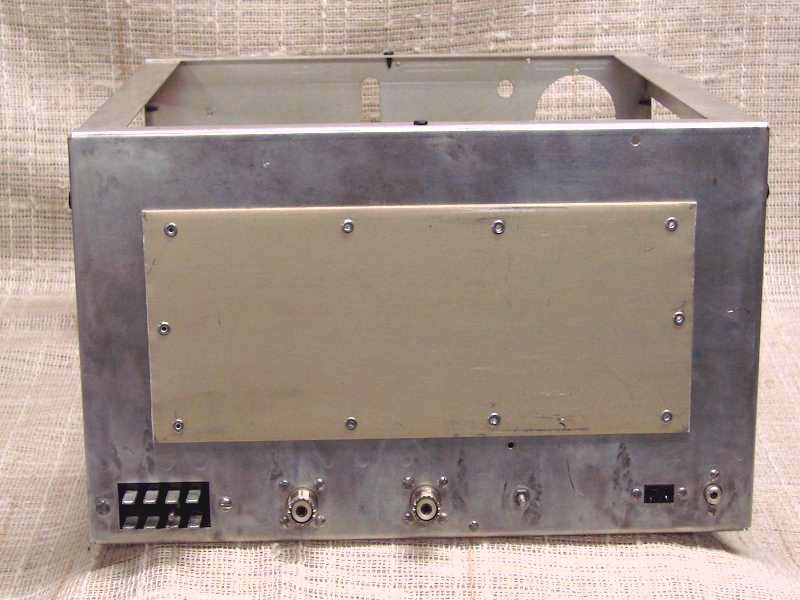
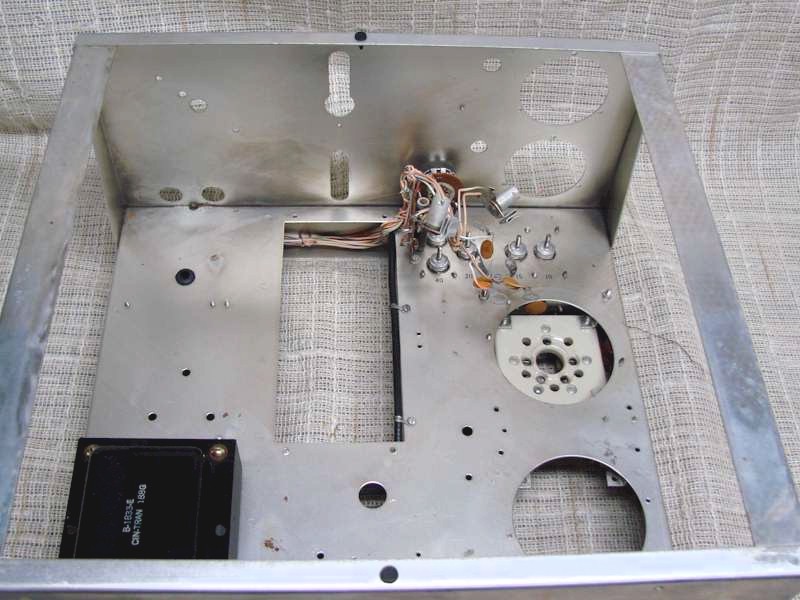
Building a high voltage power supply on the L4B chassis is a real challenge because of the lack of space. First you need to determine where and how to place the large high voltage transformer. To begin with the L4B chassis is well packed, so something needs to be eliminated to create enough space. After staring at the chassis for a while I decided the blower and one of the 3-500 final tubes had to go. In order to do this it meant stripping the entire chassis of all above chassis components to have room to work. The blower is easy to remove knowing it will never go back in. It is held in place with several screws into the back of the chassis. Second, I removing the rear final tube and socket socket, this give me sufficient room for the power transformer along the back side of the chassis. The only problem is this leaves large holes in the chassis making it difficult to mount the transformer, and the rear panel where the blower was placed. To solve this problem I cut out an aluminum plates to cover the back half of the chassis and the rear panel, and pop riveted those in place. This now allows ample room to mount the high voltage transformer to the chassis along the back wall of the chassis next to the filament transformer, and provides the mechanical support to mount the heavy power transformer. The new panel on the rear of the chassis is mostly for cosmetics, to hide the blower holes and the transformer inside.
|
||
|
|
||
 This L4B project started with an amplifier parts chassis I acquired with most of
the major components and the front panel removed. So not only was this a power supply
conversion, it also was a restoration project, giving the L4B a
second change to live again.
This L4B project started with an amplifier parts chassis I acquired with most of
the major components and the front panel removed. So not only was this a power supply
conversion, it also was a restoration project, giving the L4B a
second change to live again.